So what’s happened since my last post on the Hacklab RepRap? Quite a lot.
First of all, I went on a bit of a printing spree:
8 Vertices and more than 30 bar clamps. It turns out that you can easily print 3 vertices in one run:
Rob redesigned y-* to work with the new vertices:
UPDATE: Josef just pointed out that the latest version of the Prusa is very different. Check out the latest version here. So the preceding and next points are obsolete. Unfortunately, I don’t have one like that sitting around to do a side by side picture with. Rob would like me to mention that his work was inspired by Vik’s work.
And the idler just gets replaced by a bearing or two! That’s part drop one of this post. One gets away with this by putting the rails for the platform up instead of down, which also has the advantage of increasing the y build area (with the designs in the works for the new platform mount, it may almost double it).
It’s actually pretty awesome to see this budding hacklab-mini inside a regular Prusa:
OK. So that’s what Rob’s Been up to. But what about me?
Most of my work has been related to z-motor-mount.
Firstly, I killed tight_grip. What was tight_grip? The idea was based off an observation I made. If you make wholes for the threaded rod a little bit to small, they’ll self-tap when you put the rod in and act like nuts. It seemed like a great way to bring down the vitamin count. The only problem is that it made things hellish to assemble since the rods wouldn’t slide, especially when combined with the new vertices. So I got rid of the feature which actually wasn’t much of one.
But there was a good idea in there. So I made 3d printed nuts:
They actually work quite well (see video), though they’re a little tedious to get on the first time. I’m thinking of making a design for the vertices on the same principle, to get rid of the interior nut.
But the main thing I did was go through several iterations of designs for z-motor-mount. The first thing I tried was using a single top rod for z-motor-mount:
But that has big problems in that the natural way to carry it is by the top rod which, with this design, runs a substantial risk of breaking.
Then I tried moving diagonal rods to the side to reduces x length.
Then I tried cutting off the back half and moving the z smooth rod to the front.
The best part of this design is that, by putting the smooth rod at the front, we make a rod and two parts unnecessary.
Consider the old way to mount the smooth rod to the bottom:
This becomes something like:
It’s also an experiment in rounded parts. Actually, the following code may be of interest to some people:
module roundedCylinder(h,r,r2){
 //By Christopher Olah. BSD.
 cylinder(r=r-r2,h=h);
 translate([0,0,r2]){
 cylinder(r=r,h=h-r2*2);
 for (z=[0,2]) translate([0,0,z*(h/2-r2)])
 rotate_extrude() translate([r-r2,0,0]) circle(r2);
 }
}
(I BSD’ed it so it would be compatible with roundedBox.)
Though, honestly, I don’t think it was worth it. It massively increased compile time and wasn’t really visible in the print.
In any case, I finally decided to design it from the ground up.
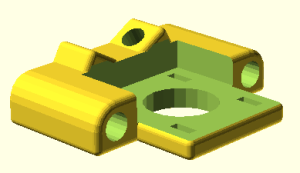
This design takes advantage of the motor for its structural integrity. It also has smooth rod at the front, and gets the same advantages. Furthermore, by decreasing the distance between the smooth and threaded rod it is possible to shrink the size of x-end-*. Also, it prints in ~30 min. The original took about an hour and 20 min. Just saying.
(Since these designs break everything, I’ve put them in the crazy-colah branch, in case you want to check them out…)
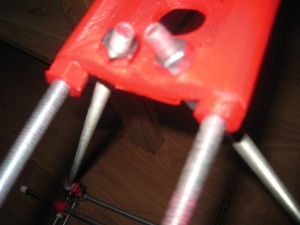
On a related note, last post I mentioned threaded rod instead of belts for x-end-*. Here’s a pic:
Though I’m not actively working on those at the minute.
Finally, I should announce that we now have a mailing list for hacklab-reprap. If you want to participate in the development process, please join!
Tags: 3d printing, openscad, reprap


January 24, 2011 at 19:28 |
cool stuff!
like the z-top! though we need to revise all the size calculations.
I’m not completely convinces, that moving the y-bar on top is a good idea – because even if it gains x-space it reduces z-space. And maybe I like the idea of a “self-contained” machine – meaning it doesn’t need space empty space around itself.
January 24, 2011 at 20:07 |
You just adjust the angle to compensate for any z loss.
January 24, 2011 at 21:48 |
Dude, when you are comparing to my version, compare to the latest rev 😉 I has totally new Y motor bracket and no Y idler bracket for example.
January 24, 2011 at 22:03 |
Heh! Rob was just pointing that out at essentially the same time. 🙂 So I’ve put in an update referring people to your wiki entry.
January 25, 2011 at 15:08 |
[…] This post was mentioned on Twitter by Coworking Toronto and HackLabTO, Christopher Olah. Christopher Olah said: Update on hacklab-reprap development: https://christopherolah.wordpress.com/2011/01/24/hacklab-reprap-coolness-2/ #reprap #3dprinting […]
March 13, 2011 at 15:40 |
I’m interested in making your variation of the Prusa Mendel. Do you have a parts list?
I’m brand new to the RepRap community. I live about 60km. from Helsinki, so I could come there to pick up RP parts, etc. I look forward to meeting some of you folks.
March 22, 2011 at 07:20 |
Hey! It’s awesome that you’re interested in the Hacklab RepRap.
… I’m afraid there isn’t a part list. Everything is very much under development and unclear right now. There isn’t even a fully functional Hacklab RepRap. I’ve actually been hired to finish the Hacklab RepRap and we want to have a working version by the Toronto Mini Maker Faire, so things should be getting a lot better soon. But as it stands, Hacklab RepRap is probably not the best choice for your first RepRap….
In any case, if that didn’t deter you from wanting to build a Hacklab RepRap, then I’ve done my due diligence and we’re happy to have you on board! You should probably write to the mailing list, but the biggest question is what extruder you want (we’re working with a Ultimaker Extruder, but they’re not widely available). And how your going to get the printed parts…